When planning to optimise the available space in your home, don’t overlook the potential of your loft. Properly installing flooring over your loft insulation can transform an often-neglected space into an inviting, useful area. You may be wondering, “How do I floor a loft over insulation?” Well, we’re here to guide you through the process.
Why Floor a Loft Over Insulation?
Loft flooring over insulation is not just a simple home improvement project; it’s an investment that offers multiple benefits. From creating additional storage space to improving energy efficiency, a floored loft can significantly enhance your home’s functionality and appeal.
A well-insulated loft ensures less heat escape, lowering your energy costs and making your home more environmentally friendly. By flooring your loft over insulation, you further reinforce this energy barrier while making the space more useful and accessible.
What is Loft Boarding?
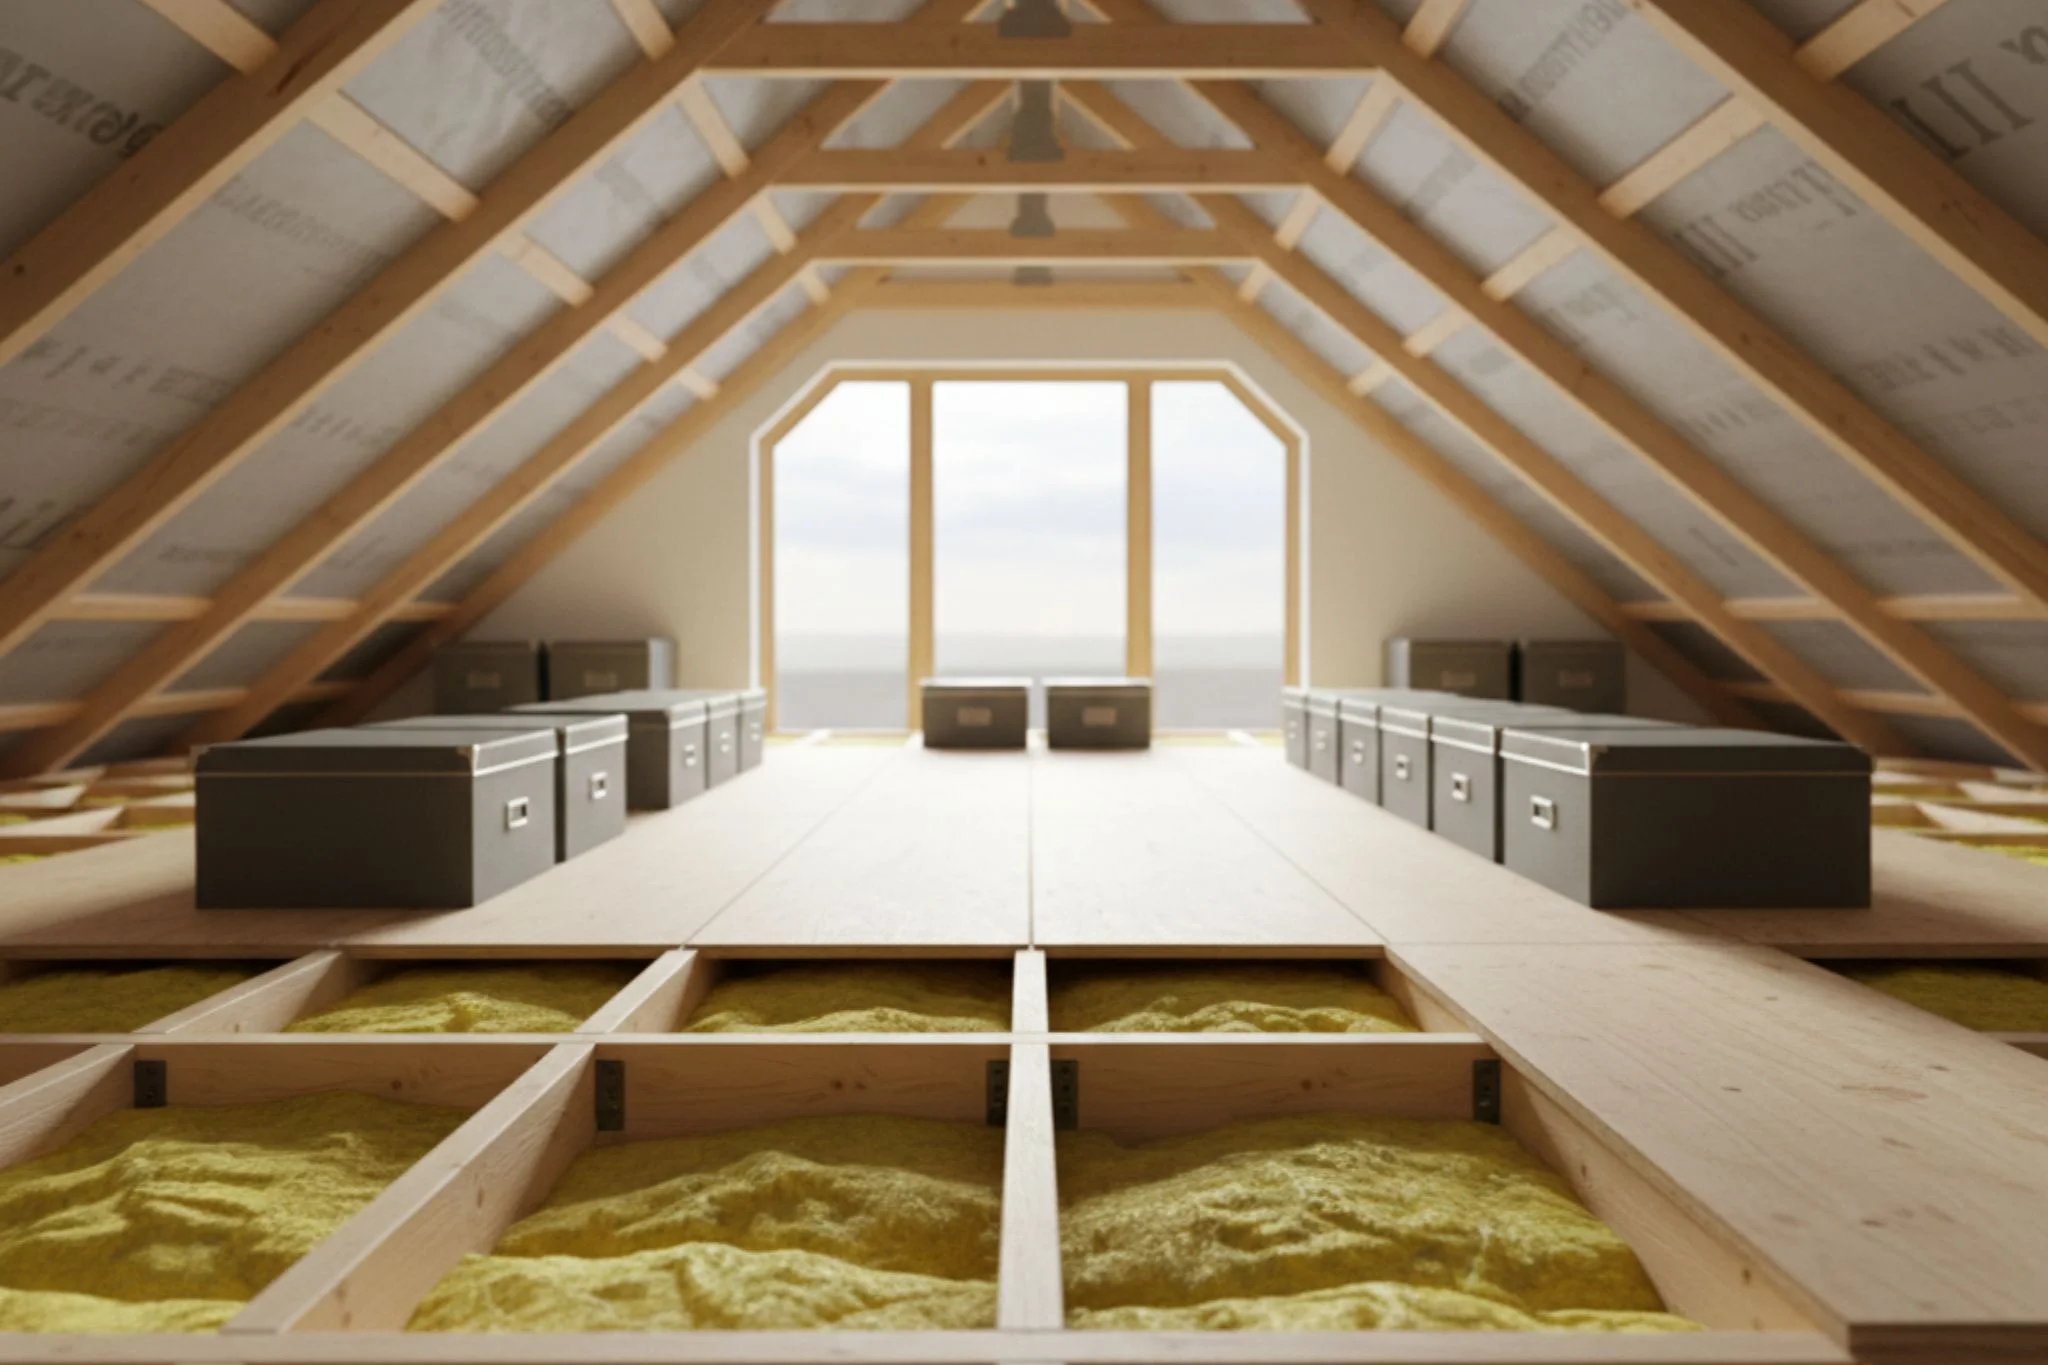
Loft boarding is the process of installing boards over your loft’s insulation to create a robust, usable floor. It is a key part of flooring a loft over insulation, providing a firm, steady surface on which you can walk or store items. The type of boards you use can have a significant impact on the success of your project, so it’s essential to choose high-quality, suitable materials.
What do you Need to Floor a Loft Over Insulation?
To floor a loft over insulation, you’ll need a few essential materials and tools:
- Loft boards: Loft boards are special boards designed for loft flooring. They are generally thicker and more durable than typical plywood sheets.
- Loft legs: These are plastic or metal legs that help raise the floor above the insulation, preventing compression and ensuring the insulation’s effectiveness.
- Saw: A saw is needed for cutting loft boards to the correct size and shape to fit your loft.
- Screwdriver or power drill: These tools will be used to secure the loft boards to the loft legs.
- Insulation material: Insulation material, typically mineral wool or fibreglass, is essential to keep your loft energy-efficient.
- Safety gear: Safety goggles, gloves, and a dust mask are crucial for protection during the flooring process.
How to Prepare Your Loft for Flooring?
Preparing your loft for flooring over insulation involves several steps, each critical to the success of the project.
Checking the Structural Integrity of Your Loft
Before starting your flooring project, you need to ensure the structural integrity of your loft. This process involves inspecting the joists to see if they can bear the weight of the new floor and the items you plan to store there.
Clearing Clutter
The loft should be thoroughly cleaned and decluttered. This activity not only creates space for work but also allows you to assess the condition of the insulation.
Installing or Checking Insulation
Install the insulation between the joists if it is not already in place, ensuring that it meets the recommended thickness level (usually 270mm). If insulation is already present, check it for any signs of dampness, damage, or decay and replace it if necessary. Remember, insulation is key to energy efficiency and warmth.
Ensuring Proper Ventilation and Lighting
Adequate ventilation is necessary to prevent condensation, which can cause dampness and rot. Installing roof vents can help facilitate this. Also, ensure that your loft is adequately lit to enable easy installation and future access.
How to Install Loft Legs Over Insulation?
Loft legs are designed to provide a sturdy platform above the insulation level without compressing or compromising it. Here’s a step-by-step guide on how to install them.
Measuring and Marking
Start by measuring the area where you will install the loft legs. They should be installed approximately 1.2 metres apart for maximum support. Mark the spots where the legs will be installed.
Installing the Loft Legs
Loft legs are usually screwed directly into the joists. Ensure they’re straight and firm. The flat part of the loft leg should be facing up, providing a support base for the loft boards.
Tips
It’s important to be careful not to compress the insulation while installing the loft legs, as this reduces their effectiveness. Use a spirit level to ensure the loft legs are installed level, which will ensure a smoother floor.
How to Install Loft Boards Over Loft Legs?
Loft boards are what create your actual loft floor. They should be carefully selected and installed to ensure the floor is sturdy and safe.
Measuring and Cutting the Loft Boards
You need to measure the area to be covered by each loft board, mark the cutting line, and then use your saw to cut them to size.
Installing the Loft Boards
The loft boards should be screwed into the cross beams of the loft legs. It’s important to make sure the boards are securely fastened to avoid any movement that could lead to instability.
Tips
To avoid gaps or uneven flooring, ensure the boards tightly abut each other. When screwing the boards into the loft legs, ensure the screws do not protrude above the surface of the board as this can cause a tripping hazard.
How to Finish Your Loft Flooring Project?
Once the loft flooring has been installed, there are a few final steps to ensure your project is complete and successful.
Checking and Testing Your Loft Flooring
It’s crucial to check your loft flooring for stability and safety once the installation process is complete. Walk over the flooring to ensure it’s stable and secure.
Cleaning and Organising Your Loft Space
Post-installation, you’ll need to clean your loft space and dispose of any waste materials appropriately. Now, you can organise your items in a way that maximises space and allows for easy access.
Decorating Your Loft Space
Once your loft is floored, it can be decorated and used as desired. Whether it’s for storage or an extra room, the addition of lighting, furniture, and accessories can enhance your loft space.
How to Add Storage Space in Your Loft?
Adding storage in your loft can help to declutter the rest of your home. You could install shelves or cupboards, or simply use stackable storage boxes. Remember, the weight of the items you store in your loft can affect the structural integrity of your home, so be mindful not to overload it.
Benefits of Flooring Your Loft Over Insulation
Flooring your loft over insulation has several benefits:
- Improved insulation efficiency: Proper flooring prevents the compression of insulation, allowing it to work at maximum efficiency.
- Additional usable space: A floored loft can be used for storage or even converted into an extra room.
- Increased property value: A usable, insulated loft can increase your home’s value.
- Lower energy bills: With improved insulation, your home stays warmer in winter and cooler in summer, reducing energy bills.
Common Mistakes When Flooring a Loft Over Insulation
Despite the benefits, some common mistakes can hinder the effectiveness of your loft flooring project:
- Compressing Insulation: Placing boards directly on top of insulation compresses it, reducing its effectiveness.
- Insufficient Insulation: The recommended depth for most homes in Ireland is 270mm. Insufficient insulation leads to increased heat loss.
- Not Using Loft Legs: Loft legs are essential to raise the floor above the insulation. Failing to use them can lead to compressed insulation.
- Uneven Loft Boarding: Incorrectly installed loft boards can lead to an uneven surface and potentially damage the ceiling below.
Safety Tips When Flooring a Loft Over Insulation
Safety should always be a priority when flooring a loft over insulation. Here are some safety tips:
- Wear Protective Gear: Always wear a dust mask, safety glasses, and gloves to protect yourself from dust and splinters.
- Work with a Buddy: Always have someone nearby in case of an emergency.
- Use Proper Lighting: A well-lit loft reduces the chances of accidents.
- Be Careful on the Ladder: Always maintain three points of contact (two hands and one foot, or two feet and one hand) when climbing up or down the ladder.
Get the Most Out of Your Loft Insulation with BuildPro
At BuildPro, we provide expert consultation services for loft flooring over insulation. Our team of professionals can guide you through every step of the process, ensuring a successful and safe project.
Let us help you get the most out of your loft insulation. Contact BuildPro today and start your loft flooring journey with confidence and expertise.


