Home
About Us
Services
Consultation
Design Consultation
Home energy & Grants Consultation
Project cost & Financial Consultation
Planning Consultation
Design
Architecture Design
BER Assessment
Interior Design
Planning Permissions
Structural Design
Quantity Surveyor
Construction
Attic Conversions
Building Extension
Granny Flats
Bungalow Extension
Home Renovation
Kitchen Renovation
Kitchen Extension
House Extension
Bathroom Renovation
New Kitchen Fitting
Porch Extension Dublin
Energy Upgrade
Deep Retrofits
Underfloor Heating
Solar PV
Heat Pumps
Windows & Doors
Insulation
Attic Insulation
Drylining Insulation
Floor Insulation
Blog
How it Works
Contact Us
Instant Online Quote
BuildPro Blog
Filter by:
All Blogs
Cost
Design
Renovation
Solar Energy
Insulation
Planning Permissions & Regulations
Government Grants
Renovation
Matt Keane
May 6, 2025
What to Include In a Project Brief Before Hiring a Builder?
Design, Renovation
Matt Keane
April 28, 2025
What are the Top Mistakes to Avoid When Designing a Bedroom?
Design, Renovation
Matt Keane
April 14, 2025
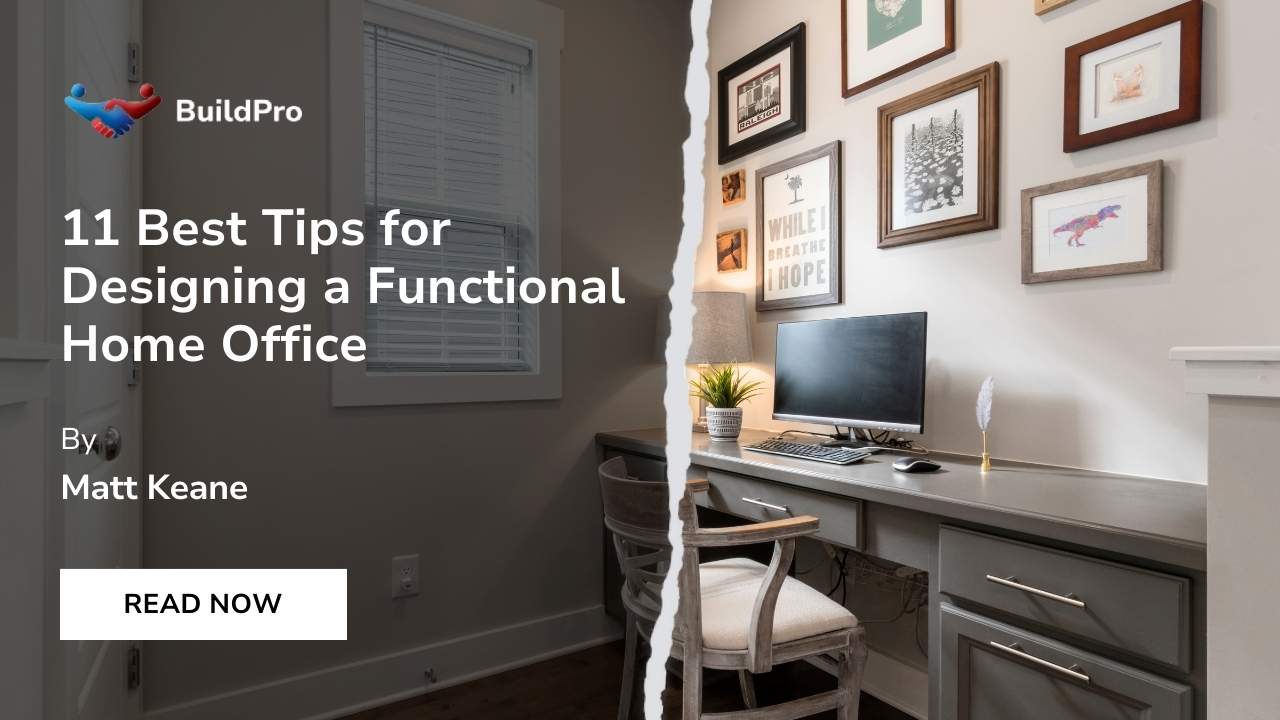
11 Best Tips for Designing a Functional Home Office
Planning Permissions & Regulations
Matt Keane
March 28, 2025
5 Expert Tips for Appealing Against Your Planning Refusal
Insulation
Matt Keane
March 19, 2025
Should Your Underfloor Heating be Left On All Day?
Insulation
Matt Keane
March 3, 2025
5 Side Effects of Underfloor Heating
Insulation
Matt Keane
February 21, 2025
Can You Have Underfloor Heating With Polished Concrete?
Design, Renovation
Matt Keane
February 12, 2025
What is the Most Popular Finish for Bathroom Fixtures in 2025?
Insulation, Design
Matt Keane
January 22, 2025
Which Houses Should Not Have Cavity Wall Insulation?
Insulation
Matt Keane
January 21, 2025
How to Insulate Aluminium Window Frames?
Insulation, Government Grants, Renovation
Matt Keane
January 6, 2025
What is the Recommended Depth of Insulation for an Attic?
Insulation, Design
Matt Keane
December 19, 2024
Can You Combine Underfloor Heating And Radiators?
Insulation
Matt Keane
December 12, 2024
Should I Insulate the Underside of My Roof?
Insulation
Matte Keane
December 4, 2024
13 Reasons Why You Need Insulation in Your Bathroom Walls
Insulation
Matt Keane
November 15, 2024
Is It Better to Insulate the Roof or the Attic?
Insulation
Matt Keane
November 8, 2024
How to Connect Underfloor Heating Manifold to Boiler?
Insulation
Matt Keane
October 24, 2024
Can You Install New Insulation Over Old Insulation?
Design, Cost
Matt Keane
October 10, 2024
Is It Expensive to Tile a Bathroom Wall?
Matt Keane
September 26, 2024
How Often Should You Change Your Attic Insulation?
Matt Keane
September 12, 2024
Can You Use Any Tiles With Underfloor Heating?
Matt Keane
August 19, 2024
Cost to Insulate Attic in Ireland
Matt Keane
August 5, 2024
How Much Does Underfloor Heating Cost in Ireland?
Matt Keane
July 25, 2024
Can I Get a Grant for Attic Insulation?
Matt Keane
July 10, 2024
Can I Get a Grant for Bathroom Renovation?
Matt Keane
June 24, 2024
Can I Get a Grant for Cavity Wall Insulation?
Matt Keane
June 17, 2024
Changing Garage Door to Window
Matt Keane
June 10, 2024
Removing a chimney
Matt Keane
June 3, 2024
Planning Permission for Driveway
Matt Keane
May 15, 2024
How Can I Make My Small Bathroom Look Luxurious?
Matt Keane
April 25, 2024
What Accessories Should You Have in a Bathroom?
Matt Keane
April 18, 2024
How to Set Up Underfloor Heating Thermostat?
Matt Keane
April 11, 2024
What is the Most Common Insulation in Ireland?
Insulation
Matt Keane
March 25, 2024
Is Expanding Foam Good Insulation?
Matt Keane
March 18, 2024
How Much Does It Cost to Have Cavity Wall Insulation?
Matt Keane
March 11, 2024
Can You Put Underfloor Heating Under a Fridge Freezer?
Matt Keane
March 4, 2024
Will My Boiler Work With Underfloor Heating?
Matt Keane
February 28, 2024
How to Insulate a Dormer Bedroom?
Matt Keane
February 20, 2024
How to Insulate a Concrete Slab?
Matt Keane
February 12, 2024
What is the Best Insulation for Cavity Walls?
Matt Keane
February 4, 2024
How to Improve Insulation?
Matt Keane
February 1, 2024
How to Save Money on Underfloor Heating?
Matt Keane
January 25, 2024
What Are the Disadvantages of Attic Insulation?
Matt Keane
January 17, 2024
How to Insulate Your Attic?
Matt Keane
January 9, 2024
How Many Hours a Day Should Underfloor Heating Be On?
Matt Keane
January 1, 2024
Can You Heat a Whole House With Underfloor Heating?
Matt Keane
December 29, 2023
What are the Three Types of Insulation?
Matt Keane
December 26, 2023
What Thickness of Insulation is Best?
Matt Keane
December 23, 2023
How Much Does It Cost to Insulate a House in Ireland?
Matt Keane
December 20, 2023
How Much Should You Spend on a Bathroom Remodel?
Matt Keane
December 17, 2023
Do You Install Flooring Before a Shower?
Matt Keane
December 14, 2023
How Much Does an Average Bathroom Renovation Cost?
Matt Keane
December 11, 2023
Project Cost & Financing Consultation Cost in Ireland
Matt Keane
December 8, 2023
Quantity Surveyor Cost in Ireland
Matt Keane
December 5, 2023
Solar PV Cost in Ireland
Matt Keane
December 2, 2023
Structural Design Cost in Ireland
Matt Keane
November 29, 2023
Windows & Doors Upgrade Cost in Ireland
Matt Keane
November 26, 2023
Planning Consultation Costs in Ireland
Matt Keane
November 23, 2023
What is the Cheapest Insulation to Buy?
Matt Keane
November 20, 2023
Which Types of Tiles are Best for Bathroom?
Matt Keane
November 17, 2023
What Colours Make a Small Bathroom Look Bigger?
Matt Keane
November 14, 2023
What are the Disadvantages of Cavity Wall Insulation?
Matt Keane
November 11, 2023
What is in Cavity Wall Insulation?
Matt Keane
November 8, 2023
What Insulation Stops Condensation?
Matt Keane
November 5, 2023
Interior Design Cost in Ireland
Matt Keane
November 2, 2023
Deep Retrofit Cost in Ireland
Matt Keane
October 29, 2023
Energy Upgrade Costs in Ireland
Matt Keane
October 26, 2023
Heat Pumps Cost in Ireland
Matt Keane
October 23, 2023
Can Insulation Make Condensation Worse?
Matt Keane
October 20, 2023
How Many Layers of Insulation Do I Need?
Design, Renovation
Matt Keane
October 17, 2023
8 Trending Bathroom Design Ideas That Will Wow You!
Matt Keane
October 14, 2023
Do You Tile a Bathroom Floor or Wall First?
Matt Keane
October 11, 2023
Does Wall Insulation Reduce Noise?
Matt Keane
October 8, 2023
How Much Attic Insulation Do You Need?
Matt Keane
October 5, 2023
Does Insulating Your Home Cause Damp?
Matt Keane
October 2, 2023
Can I Tile a Bathroom Myself?
Matt Keane
September 19, 2023
Ways to Improve Solar Panel Efficiency And Output
Matt Keane
September 16, 2023
Popular Solar Panel Monitoring Apps to Check Out
Matt Keane
September 13, 2023
How to Properly Dispose of Or Recycle Solar Panels
Matt Keane
September 10, 2023
How to Install Solar Panels On A Flat Roof?
Matt Keane
September 7, 2023
How to Incorporate Solar Panels Into Your Home Design?
Matt Keane
September 4, 2023
How to Calculate the ROI of Solar Panel Installations
Matt Keane
September 1, 2023
Bathroom Remodel Cost
Matt Keane
August 11, 2023
Do You Need Planning Permission for a Shed?
Matt Keane
August 8, 2023
Do Portable Buildings Need Planning Permission?
Matt Keane
August 5, 2023
Planning Permission for a Modular Home?
Matt Keane
August 2, 2023
Planning Permission for a Carport
Matt Keane
July 29, 2023
Planning Permission for a Dormer Loft Conversion?
Matt Keane
July 26, 2023
Modern Contemporary Interior Design Ideas
Matt Keane
July 24, 2023
How Much Does the BER Assessment Cost?
Matt Keane
July 24, 2023
How Long Does a BER Take to Produce?
Design, Renovation
Matt Keane
July 24, 2023
5 Ways to Increase Your Home's Value in 2025
Matt Keane
July 24, 2023
How to Improve Your Home's Building Energy Rating (BER)?
Matt Keane
July 24, 2023
Do I Need Planning Permission for a Satellite Dish?
Matt Keane
July 24, 2023
Do I Need Planning Permission to Remove a Chimney?
Matt Keane
July 24, 2023
What are the Interior Design Tips for Small Spaces?
Matt Keane
July 24, 2023
Do I Need Planning Permission for an Attic Conversion?
Matt Keane
July 23, 2023
Residential Structural Engineer Cost
Matt Keane
July 20, 2023
How to Upgrade to a Bigger Solar Power System?
Renovation, Design
Matt Keane
July 17, 2023
8 Exciting Bathroom Renovation Tips for 2025
Matt Keane
July 17, 2023
In What Order Should You Renovate a Bathroom?
Renovation
Matt Keane
May 6, 2025
What to Include In a Project Brief Before Hiring a Builder?
Design, Renovation
Matt Keane
April 28, 2025
What are the Top Mistakes to Avoid When Designing a Bedroom?
Design, Renovation
Matt Keane
April 14, 2025
11 Best Tips for Designing a Functional Home Office
Planning Permissions & Regulations
Matt Keane
March 28, 2025
5 Expert Tips for Appealing Against Your Planning Refusal
Insulation
Matt Keane
March 19, 2025
Should Your Underfloor Heating be Left On All Day?
Insulation
Matt Keane
March 3, 2025
5 Side Effects of Underfloor Heating
Insulation
Matt Keane
February 21, 2025
Can You Have Underfloor Heating With Polished Concrete?
Design, Renovation
Matt Keane
February 12, 2025
What is the Most Popular Finish for Bathroom Fixtures in 2025?
Insulation, Design
Matt Keane
January 22, 2025
Which Houses Should Not Have Cavity Wall Insulation?
Insulation
Matt Keane
January 21, 2025
How to Insulate Aluminium Window Frames?
Insulation, Government Grants, Renovation
Matt Keane
January 6, 2025
What is the Recommended Depth of Insulation for an Attic?
Insulation, Design
Matt Keane
December 19, 2024
Can You Combine Underfloor Heating And Radiators?
Insulation
Matt Keane
December 12, 2024
Should I Insulate the Underside of My Roof?
Insulation
Matte Keane
December 4, 2024
13 Reasons Why You Need Insulation in Your Bathroom Walls
Insulation
Matt Keane
November 15, 2024
Is It Better to Insulate the Roof or the Attic?
Insulation
Matt Keane
November 8, 2024
How to Connect Underfloor Heating Manifold to Boiler?
Insulation
Matt Keane
October 24, 2024
Can You Install New Insulation Over Old Insulation?
Design, Cost
Matt Keane
October 10, 2024
Is It Expensive to Tile a Bathroom Wall?
Matt Keane
September 26, 2024
How Often Should You Change Your Attic Insulation?
Matt Keane
September 12, 2024
Can You Use Any Tiles With Underfloor Heating?
Matt Keane
August 19, 2024
Cost to Insulate Attic in Ireland
Matt Keane
August 5, 2024
How Much Does Underfloor Heating Cost in Ireland?
Matt Keane
July 25, 2024
Can I Get a Grant for Attic Insulation?
Matt Keane
July 10, 2024
Can I Get a Grant for Bathroom Renovation?
Matt Keane
June 24, 2024
Can I Get a Grant for Cavity Wall Insulation?
Matt Keane
June 17, 2024
Changing Garage Door to Window
Matt Keane
June 10, 2024
Removing a chimney
Matt Keane
June 3, 2024
Planning Permission for Driveway
Matt Keane
May 15, 2024
How Can I Make My Small Bathroom Look Luxurious?
Matt Keane
April 25, 2024
What Accessories Should You Have in a Bathroom?
Matt Keane
April 18, 2024
How to Set Up Underfloor Heating Thermostat?
Matt Keane
April 11, 2024
What is the Most Common Insulation in Ireland?
Insulation
Matt Keane
March 25, 2024
Is Expanding Foam Good Insulation?
Matt Keane
March 18, 2024
How Much Does It Cost to Have Cavity Wall Insulation?
Matt Keane
March 11, 2024
Can You Put Underfloor Heating Under a Fridge Freezer?
Matt Keane
March 4, 2024
Will My Boiler Work With Underfloor Heating?
Matt Keane
February 28, 2024
How to Insulate a Dormer Bedroom?
Matt Keane
February 20, 2024
How to Insulate a Concrete Slab?
Matt Keane
February 12, 2024
What is the Best Insulation for Cavity Walls?
Matt Keane
February 4, 2024
How to Improve Insulation?
Matt Keane
February 1, 2024
How to Save Money on Underfloor Heating?
Matt Keane
January 25, 2024
What Are the Disadvantages of Attic Insulation?
Matt Keane
January 17, 2024
How to Insulate Your Attic?
Matt Keane
January 9, 2024
How Many Hours a Day Should Underfloor Heating Be On?
Matt Keane
January 1, 2024
Can You Heat a Whole House With Underfloor Heating?
Matt Keane
December 29, 2023
What are the Three Types of Insulation?
Matt Keane
December 26, 2023
What Thickness of Insulation is Best?
Matt Keane
December 23, 2023
How Much Does It Cost to Insulate a House in Ireland?
Matt Keane
December 20, 2023
How Much Should You Spend on a Bathroom Remodel?
Matt Keane
December 17, 2023
Do You Install Flooring Before a Shower?
Matt Keane
December 14, 2023
How Much Does an Average Bathroom Renovation Cost?
Matt Keane
December 11, 2023
Project Cost & Financing Consultation Cost in Ireland
Matt Keane
December 8, 2023
Quantity Surveyor Cost in Ireland
Matt Keane
December 5, 2023
Solar PV Cost in Ireland
Matt Keane
December 2, 2023
Structural Design Cost in Ireland
Matt Keane
November 29, 2023
Windows & Doors Upgrade Cost in Ireland
Matt Keane
November 26, 2023
Planning Consultation Costs in Ireland
Matt Keane
November 23, 2023
What is the Cheapest Insulation to Buy?
Matt Keane
November 20, 2023
Which Types of Tiles are Best for Bathroom?
Matt Keane
November 17, 2023
What Colours Make a Small Bathroom Look Bigger?
Matt Keane
November 14, 2023
What are the Disadvantages of Cavity Wall Insulation?
Matt Keane
November 11, 2023
What is in Cavity Wall Insulation?
Matt Keane
November 8, 2023
What Insulation Stops Condensation?
Matt Keane
November 5, 2023
Interior Design Cost in Ireland
Matt Keane
November 2, 2023
Deep Retrofit Cost in Ireland
Matt Keane
October 29, 2023
Energy Upgrade Costs in Ireland
Matt Keane
October 26, 2023
Heat Pumps Cost in Ireland
Matt Keane
October 23, 2023
Can Insulation Make Condensation Worse?
Matt Keane
October 20, 2023
How Many Layers of Insulation Do I Need?
Design, Renovation
Matt Keane
October 17, 2023
8 Trending Bathroom Design Ideas That Will Wow You!
Matt Keane
October 14, 2023
Do You Tile a Bathroom Floor or Wall First?
Matt Keane
October 11, 2023
Does Wall Insulation Reduce Noise?
Matt Keane
October 8, 2023
How Much Attic Insulation Do You Need?
Matt Keane
October 5, 2023
Does Insulating Your Home Cause Damp?
Matt Keane
October 2, 2023
Can I Tile a Bathroom Myself?
Matt Keane
September 19, 2023
Ways to Improve Solar Panel Efficiency And Output
Matt Keane
September 16, 2023
Popular Solar Panel Monitoring Apps to Check Out
Matt Keane
September 13, 2023
How to Properly Dispose of Or Recycle Solar Panels
Matt Keane
September 10, 2023
How to Install Solar Panels On A Flat Roof?
Matt Keane
September 7, 2023
How to Incorporate Solar Panels Into Your Home Design?
Matt Keane
September 4, 2023
How to Calculate the ROI of Solar Panel Installations
Matt Keane
September 1, 2023
Bathroom Remodel Cost
Matt Keane
August 11, 2023
Do You Need Planning Permission for a Shed?
Matt Keane
August 8, 2023
Do Portable Buildings Need Planning Permission?
Matt Keane
August 5, 2023
Planning Permission for a Modular Home?
Matt Keane
August 2, 2023
Planning Permission for a Carport
Matt Keane
July 29, 2023
Planning Permission for a Dormer Loft Conversion?
Matt Keane
July 26, 2023
Modern Contemporary Interior Design Ideas
Matt Keane
July 24, 2023
How Much Does the BER Assessment Cost?
Matt Keane
July 24, 2023
How Long Does a BER Take to Produce?
Design, Renovation
Matt Keane
July 24, 2023
5 Ways to Increase Your Home's Value in 2025
Matt Keane
July 24, 2023
How to Improve Your Home's Building Energy Rating (BER)?
Matt Keane
July 24, 2023
Do I Need Planning Permission for a Satellite Dish?
Matt Keane
July 24, 2023
Do I Need Planning Permission to Remove a Chimney?
Matt Keane
July 24, 2023
What are the Interior Design Tips for Small Spaces?
Matt Keane
July 24, 2023
Do I Need Planning Permission for an Attic Conversion?
Matt Keane
July 23, 2023
Residential Structural Engineer Cost
Matt Keane
July 20, 2023
How to Upgrade to a Bigger Solar Power System?
Renovation, Design
Matt Keane
July 17, 2023
8 Exciting Bathroom Renovation Tips for 2025
Matt Keane
July 17, 2023
In What Order Should You Renovate a Bathroom?
Design, Cost
Matt Keane
October 10, 2024
Is It Expensive to Tile a Bathroom Wall?
Matt Keane
August 19, 2024
Cost to Insulate Attic in Ireland
Matt Keane
August 5, 2024
How Much Does Underfloor Heating Cost in Ireland?
Matt Keane
July 25, 2024
Can I Get a Grant for Attic Insulation?
Matt Keane
July 10, 2024
Can I Get a Grant for Bathroom Renovation?
Matt Keane
April 11, 2024
What is the Most Common Insulation in Ireland?
Matt Keane
March 18, 2024
How Much Does It Cost to Have Cavity Wall Insulation?
Matt Keane
December 23, 2023
How Much Does It Cost to Insulate a House in Ireland?
Matt Keane
December 20, 2023
How Much Should You Spend on a Bathroom Remodel?
Matt Keane
December 14, 2023
How Much Does an Average Bathroom Renovation Cost?
Matt Keane
December 11, 2023
Project Cost & Financing Consultation Cost in Ireland
Matt Keane
December 8, 2023
Quantity Surveyor Cost in Ireland
Matt Keane
December 5, 2023
Solar PV Cost in Ireland
Matt Keane
December 2, 2023
Structural Design Cost in Ireland
Matt Keane
November 29, 2023
Windows & Doors Upgrade Cost in Ireland
Matt Keane
November 26, 2023
Planning Consultation Costs in Ireland
Matt Keane
November 5, 2023
Interior Design Cost in Ireland
Matt Keane
November 2, 2023
Deep Retrofit Cost in Ireland
Matt Keane
October 29, 2023
Energy Upgrade Costs in Ireland
Matt Keane
October 26, 2023
Heat Pumps Cost in Ireland
Matt Keane
September 1, 2023
Bathroom Remodel Cost
Matt Keane
July 24, 2023
How Much Does the BER Assessment Cost?
Matt Keane
July 23, 2023
Residential Structural Engineer Cost
Cost, Renovation
Matt Keane
July 5, 2023
How Much Would It Cost to Remodel a Small Bathroom?
Matt Keane
June 7, 2023
How Much Does a Bathroom Renovation Cost in Ireland? An In-Depth Guide
Matt Keane
June 6, 2023
How Much Does a Garage Extension Cost in Ireland? Your Ultimate 2024 Guide
Matt Keane
June 1, 2023
Porch Extension Cost Ireland - Budget-Friendly Options & Estimates
Matt Keane
May 29, 2023
How Much Does a Double-Storey Extension Cost in Ireland?
Matt Keane
May 21, 2023
House Extensions Ireland Cost: an In-Depth Analysis
Matt Keane
May 14, 2023
Interior Renovation Cost Breakdown: How to Allocate Your Budget Wisely
Matt Keane
May 7, 2023
How Much Does a New Bathroom Cost? Find Out the Average Expenses
Matt Keane
April 30, 2023
Attic Extension Cost - Tips to Keep Your Project Within Budget
Matt Keane
April 23, 2023
Small Garden Renovation Cost: Budget-Friendly Ideas
Matt Keane
April 16, 2023
House Renovation Cost in Ireland: What to Expect And How to Plan
Matt Keane
April 9, 2023
Architectural Design Costs in Ireland: an In-Depth Guide
Matt Keane
February 5, 2023
How Much Does Planning Permission Cost in Ireland?
Design, Renovation
Matt Keane
April 28, 2025
What are the Top Mistakes to Avoid When Designing a Bedroom?
Design, Renovation
Matt Keane
April 14, 2025
11 Best Tips for Designing a Functional Home Office
Design, Renovation
Matt Keane
February 12, 2025
What is the Most Popular Finish for Bathroom Fixtures in 2025?
Insulation, Design
Matt Keane
January 22, 2025
Which Houses Should Not Have Cavity Wall Insulation?
Insulation, Design
Matt Keane
December 19, 2024
Can You Combine Underfloor Heating And Radiators?
Design, Cost
Matt Keane
October 10, 2024
Is It Expensive to Tile a Bathroom Wall?
Matt Keane
July 10, 2024
Can I Get a Grant for Bathroom Renovation?
Matt Keane
June 17, 2024
Changing Garage Door to Window
Matt Keane
June 10, 2024
Removing a chimney
Matt Keane
May 15, 2024
How Can I Make My Small Bathroom Look Luxurious?
Matt Keane
April 25, 2024
What Accessories Should You Have in a Bathroom?
Matt Keane
December 17, 2023
Do You Install Flooring Before a Shower?
Matt Keane
November 20, 2023
Which Types of Tiles are Best for Bathroom?
Matt Keane
November 17, 2023
What Colours Make a Small Bathroom Look Bigger?
Design, Renovation
Matt Keane
October 17, 2023
8 Trending Bathroom Design Ideas That Will Wow You!
Matt Keane
October 14, 2023
Do You Tile a Bathroom Floor or Wall First?
Matt Keane
September 7, 2023
How to Incorporate Solar Panels Into Your Home Design?
Matt Keane
July 26, 2023
Modern Contemporary Interior Design Ideas
Design, Renovation
Matt Keane
July 24, 2023
5 Ways to Increase Your Home's Value in 2025
Renovation, Design
Matt Keane
July 17, 2023
8 Exciting Bathroom Renovation Tips for 2025
Design, Renovation
Matt Keane
July 2, 2023
How to Make a Bathroom Modern on a Budget?
Matt Keane
March 19, 2023
House Architecture Design Ideas in Ireland -Unleash Your Dream Home
Matt Keane
March 5, 2023
Modern Architecture Interior Design: Transforming Spaces in Ireland
Matt Keane
February 12, 2023
Architecture Tips for House Design: Buildpro'S Expert Guide
Renovation
Matt Keane
May 6, 2025
What to Include In a Project Brief Before Hiring a Builder?
Design, Renovation
Matt Keane
April 28, 2025
What are the Top Mistakes to Avoid When Designing a Bedroom?
Design, Renovation
Matt Keane
April 14, 2025
11 Best Tips for Designing a Functional Home Office
Design, Renovation
Matt Keane
February 12, 2025
What is the Most Popular Finish for Bathroom Fixtures in 2025?
Insulation, Government Grants, Renovation
Matt Keane
January 6, 2025
What is the Recommended Depth of Insulation for an Attic?
Matt Keane
September 26, 2024
How Often Should You Change Your Attic Insulation?
Matt Keane
July 10, 2024
Can I Get a Grant for Bathroom Renovation?
Matt Keane
June 17, 2024
Changing Garage Door to Window
Matt Keane
June 10, 2024
Removing a chimney
Matt Keane
June 3, 2024
Planning Permission for Driveway
Matt Keane
May 15, 2024
How Can I Make My Small Bathroom Look Luxurious?
Matt Keane
April 25, 2024
What Accessories Should You Have in a Bathroom?
Matt Keane
December 20, 2023
How Much Should You Spend on a Bathroom Remodel?
Matt Keane
December 14, 2023
How Much Does an Average Bathroom Renovation Cost?
Design, Renovation
Matt Keane
October 17, 2023
8 Trending Bathroom Design Ideas That Will Wow You!
Matt Keane
October 2, 2023
Can I Tile a Bathroom Myself?
Design, Renovation
Matt Keane
July 24, 2023
5 Ways to Increase Your Home's Value in 2025
Renovation, Design
Matt Keane
July 17, 2023
8 Exciting Bathroom Renovation Tips for 2025
Matt Keane
July 17, 2023
In What Order Should You Renovate a Bathroom?
Matt Keane
July 16, 2023
Does Bathroom Renovation Add Value to a House?
Matt Keane
July 15, 2023
Can You Renovate a Bathroom Yourself?
Matt Keane
July 14, 2023
How Long Does It Take to Renovate a Small Bathroom?
Matt Keane
July 11, 2023
Bathroom Renovation Ideas
Matt Keane
July 8, 2023
How Do You Renovate an Old Bathroom on a Budget?
Matt Keane
July 7, 2023
What Type of Flooring is Best for Underfloor Heating?
Cost, Renovation
Matt Keane
July 5, 2023
How Much Would It Cost to Remodel a Small Bathroom?
Design, Renovation
Matt Keane
July 2, 2023
How to Make a Bathroom Modern on a Budget?
Matt Keane
March 12, 2023
Home Renovation Incentive Scheme: Unlock Huge Savings on Your Property Makeover
Matt Keane
September 19, 2023
Ways to Improve Solar Panel Efficiency And Output
Matt Keane
September 16, 2023
Popular Solar Panel Monitoring Apps to Check Out
Matt Keane
September 13, 2023
How to Properly Dispose of Or Recycle Solar Panels
Matt Keane
September 10, 2023
How to Install Solar Panels On A Flat Roof?
Matt Keane
September 7, 2023
How to Incorporate Solar Panels Into Your Home Design?
Matt Keane
September 4, 2023
How to Calculate the ROI of Solar Panel Installations
Matt Keane
July 24, 2023
How Long Does a BER Take to Produce?
Matt Keane
July 24, 2023
How to Improve Your Home's Building Energy Rating (BER)?
Matt Keane
July 20, 2023
How to Upgrade to a Bigger Solar Power System?
Insulation
Matt Keane
March 19, 2025
Should Your Underfloor Heating be Left On All Day?
Insulation
Matt Keane
March 3, 2025
5 Side Effects of Underfloor Heating
Insulation
Matt Keane
February 21, 2025
Can You Have Underfloor Heating With Polished Concrete?
Insulation, Design
Matt Keane
January 22, 2025
Which Houses Should Not Have Cavity Wall Insulation?
Insulation
Matt Keane
January 21, 2025
How to Insulate Aluminium Window Frames?
Insulation, Government Grants, Renovation
Matt Keane
January 6, 2025
What is the Recommended Depth of Insulation for an Attic?
Insulation, Design
Matt Keane
December 19, 2024
Can You Combine Underfloor Heating And Radiators?
Insulation
Matt Keane
December 12, 2024
Should I Insulate the Underside of My Roof?
Insulation
Matte Keane
December 4, 2024
13 Reasons Why You Need Insulation in Your Bathroom Walls
Insulation
Matt Keane
November 15, 2024
Is It Better to Insulate the Roof or the Attic?
Insulation
Matt Keane
November 8, 2024
How to Connect Underfloor Heating Manifold to Boiler?
Insulation
Matt Keane
October 24, 2024
Can You Install New Insulation Over Old Insulation?
Matt Keane
September 26, 2024
How Often Should You Change Your Attic Insulation?
Matt Keane
September 12, 2024
Can You Use Any Tiles With Underfloor Heating?
Matt Keane
August 19, 2024
Cost to Insulate Attic in Ireland
Matt Keane
August 5, 2024
How Much Does Underfloor Heating Cost in Ireland?
Matt Keane
July 25, 2024
Can I Get a Grant for Attic Insulation?
Matt Keane
June 24, 2024
Can I Get a Grant for Cavity Wall Insulation?
Matt Keane
April 18, 2024
How to Set Up Underfloor Heating Thermostat?
Matt Keane
April 11, 2024
What is the Most Common Insulation in Ireland?
Insulation
Matt Keane
March 25, 2024
Is Expanding Foam Good Insulation?
Matt Keane
March 11, 2024
Can You Put Underfloor Heating Under a Fridge Freezer?
Matt Keane
March 4, 2024
Will My Boiler Work With Underfloor Heating?
Matt Keane
February 28, 2024
How to Insulate a Dormer Bedroom?
Matt Keane
February 20, 2024
How to Insulate a Concrete Slab?
Matt Keane
February 12, 2024
What is the Best Insulation for Cavity Walls?
Matt Keane
February 4, 2024
How to Improve Insulation?
Matt Keane
February 1, 2024
How to Save Money on Underfloor Heating?
Matt Keane
January 25, 2024
What Are the Disadvantages of Attic Insulation?
Matt Keane
January 17, 2024
How to Insulate Your Attic?
Matt Keane
January 9, 2024
How Many Hours a Day Should Underfloor Heating Be On?
Matt Keane
January 1, 2024
Can You Heat a Whole House With Underfloor Heating?
Matt Keane
December 29, 2023
What are the Three Types of Insulation?
Matt Keane
December 26, 2023
What Thickness of Insulation is Best?
Matt Keane
December 23, 2023
How Much Does It Cost to Insulate a House in Ireland?
Matt Keane
November 23, 2023
What is the Cheapest Insulation to Buy?
Matt Keane
November 14, 2023
What are the Disadvantages of Cavity Wall Insulation?
Matt Keane
November 11, 2023
What is in Cavity Wall Insulation?
Matt Keane
November 8, 2023
What Insulation Stops Condensation?
Matt Keane
October 23, 2023
Can Insulation Make Condensation Worse?
Matt Keane
October 20, 2023
How Many Layers of Insulation Do I Need?
Matt Keane
October 11, 2023
Does Wall Insulation Reduce Noise?
Matt Keane
October 8, 2023
How Much Attic Insulation Do You Need?
Matt Keane
October 5, 2023
Does Insulating Your Home Cause Damp?
Matt Keane
July 14, 2023
How to Insulate Your House for Winter?
Matt Keane
July 13, 2023
Can I Use Spray Foam As Insulation?
Matt Keane
July 12, 2023
How to Floor a Loft Over Insulation?
Matt Keane
July 11, 2023
Is It Good to Insulate Attic Ceiling?
Matt Keane
July 10, 2023
Is Adding Insulation to Attic Worth It?
Matt Keane
July 9, 2023
How to Install Water Underfloor Heating?
Matt Keane
July 8, 2023
How Long Does Underfloor Heating Take to Work?
Matt Keane
July 6, 2023
Is It Worth Having Underfloor Heating?
Matt Keane
July 5, 2023
What is Cheaper, Underfloor Heating or Radiators?
Matt Keane
July 4, 2023
What is the Life Expectancy of Underfloor Heating?
Matt Keane
July 3, 2023
Do I Need Radiators With Underfloor Heating?
Planning Permissions & Regulations
Matt Keane
March 28, 2025
5 Expert Tips for Appealing Against Your Planning Refusal
Matt Keane
July 10, 2024
Can I Get a Grant for Bathroom Renovation?
Matt Keane
June 17, 2024
Changing Garage Door to Window
Matt Keane
June 3, 2024
Planning Permission for Driveway
Matt Keane
August 11, 2023
Do You Need Planning Permission for a Shed?
Matt Keane
August 8, 2023
Do Portable Buildings Need Planning Permission?
Matt Keane
August 5, 2023
Planning Permission for a Modular Home?
Matt Keane
August 2, 2023
Planning Permission for a Carport
Matt Keane
July 29, 2023
Planning Permission for a Dormer Loft Conversion?
Matt Keane
July 24, 2023
Do I Need Planning Permission for a Satellite Dish?
Matt Keane
July 24, 2023
Do I Need Planning Permission to Remove a Chimney?
Matt Keane
July 24, 2023
Do I Need Planning Permission for an Attic Conversion?
Matt Keane
July 3, 2023
Do You Need Planning Permission for a Pool in Ireland?
Matt Keane
April 2, 2023
How to Get Planning Permission for Buildings on Green Belt Land in Ireland?
Matt Keane
March 26, 2023
Do I Need Planning Permission for a Log Cabin in Ireland?
Matt Keane
February 19, 2023
Do You Need Planning Permission for a Mobile Home in Ireland?
Matt Keane
January 29, 2023
Do I Need Planning Permission for a Fence in Ireland?
Insulation, Government Grants, Renovation
Matt Keane
January 6, 2025
What is the Recommended Depth of Insulation for an Attic?
Matt Keane
July 25, 2024
Can I Get a Grant for Attic Insulation?
Matt Keane
July 10, 2024
Can I Get a Grant for Bathroom Renovation?
Matt Keane
June 24, 2024
Can I Get a Grant for Cavity Wall Insulation?
Matt Keane
March 12, 2023
Home Renovation Incentive Scheme: Unlock Huge Savings on Your Property Makeover
Copyright © 2024 BuildPro. Designed by Social Gravity.
Close Cookie Popup
Cookie Settings
This website site use cookies to ensure you get the best experience on our website.
Accept All Cookies